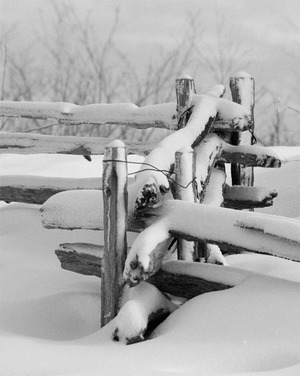
Basic Black and White Landscape Photography
B+W photography is photography at its most essential. Often the everyday scene takes on a surreal look, when given a B+W treatment. In this article, I am going to discuss the basics of B+W (AKA monochrome) photography and my way of approaching this particular art form.
In my opinion, it is best to use an SLR or DSLR camera. These cameras offer more control to the photographer, a necessity for an artistic approach. It is possible to take fine photographs with a point and shoot, but advancing your skills as a photographer is difficult.
Many digital photographers will set their cameras to BW mode for shooting monochrome images. I do not recommend this limiting choice. There many effective ways to convert a color image to monochrome, including using software designed specifically for that purpose.
Artistic Stuff:
- B+W is different, but all the same rules of composition apply
- VISUALIZE your scene as you compose both with and without your viewfinder
- choose a focal point (subject) and try to include foreground interest
- look for line and texture to enhance your composition
- make use of negative space
- move around and try lots of angles (using a prime lens can teach you a lot about composition)
Shooting:
- make sure you have everything before you leave home ….. batteries charged, camera and lenses clean
- when you arrive at the location take a good look around, scouting for different subjects, angles, and foreground interest
- use viewfinder to compose ….. VISUALIZE how you want the image to look
- break the rules
- use the available light to your advantage …… I almost always shoot within an hour of sunset or sunrise
- review and refine what you have taken …… experiment **** a professional photographer will be happy if he gets 1 or 2 good shots from a roll of
film, why should you expect every shot you take to be a keeper …… you can learn through experimentation
Photoshop Stuff:
- there are many ways to convert a color file to B+W …. desaturate, convert to grayscale, use layers, use special software
- cropping, dodging, and burning can all improve an already good image
- using “Levels” (curves in Photoshop CS) can correct exposure problems
Printing:
- printing B+W is more difficult than it appears (color casts are hard to get rid of) and expensive
- printing at home should only be done on a dedicated photo printer
- use the paper and ink designed for your printer … I use Epson paper exclusively in my 2400
- with some Epson printers you can print with the black cartridge only, to avoid problems
- if you don't care to tackle printing, find a good lab
Summary:
- shoot aperture priority at the smallest (largest number) setting you can hand hold or else use a tripod
- shoot close to sunset or sunrise
- try to visualize each shot before you take it …. imagine it in B+W, and how you want it to look printed
- shoot what YOU feel is interesting or beautiful and EXPERIMENT
